Logging and debugging without xcode - using OSLog
Luke, 28 Aug 2019
I had a crash issue recently that was only happening to a released build, and could not be reproduced when debugging directly from XCode. It was a slightly unusual situation, and I had to be able to get to the bottom of the issue without all the usual assistance such as breakpoints, logging, tools, etc. All I had for assistance was the standard MacOS Console (the same one is available in XCode) and various callstacks pointing to the failure. For testing, I had to create a .ipa file and install it directly rather than running from XCode – because otherwise the crash did not occur.
Although ultimately getting a properly symbolicated callstack managed to shed light on the cause of the crash, it wasn’t the full story – I needed to find out why my particular fatalError had been triggered, which had itself been caused by a crucial property being nil. It was probably a race condition, but I really needed logging to be sure. But without XCode debugging, I couldn’t see the results of print statements or NSLog output. So what to do? OSLog comes to the rescue in this scenario. It had passed me by when first released for iOS 10, but it has become my logging method of choice now.
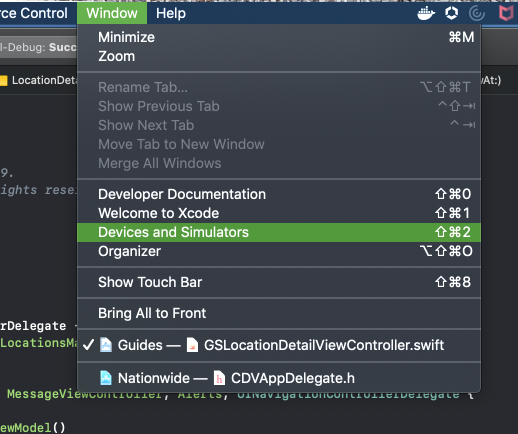
First – heres a look at what I am aiming for. I want to be able to put log statements in my code at various crucial points, and for that log to appear in the standard Console output, rather than in the normal debugging window in XCode. First, my device is plugged in to my machine via the usual cable. I go to the Devices and Simulators option in the Window menu :
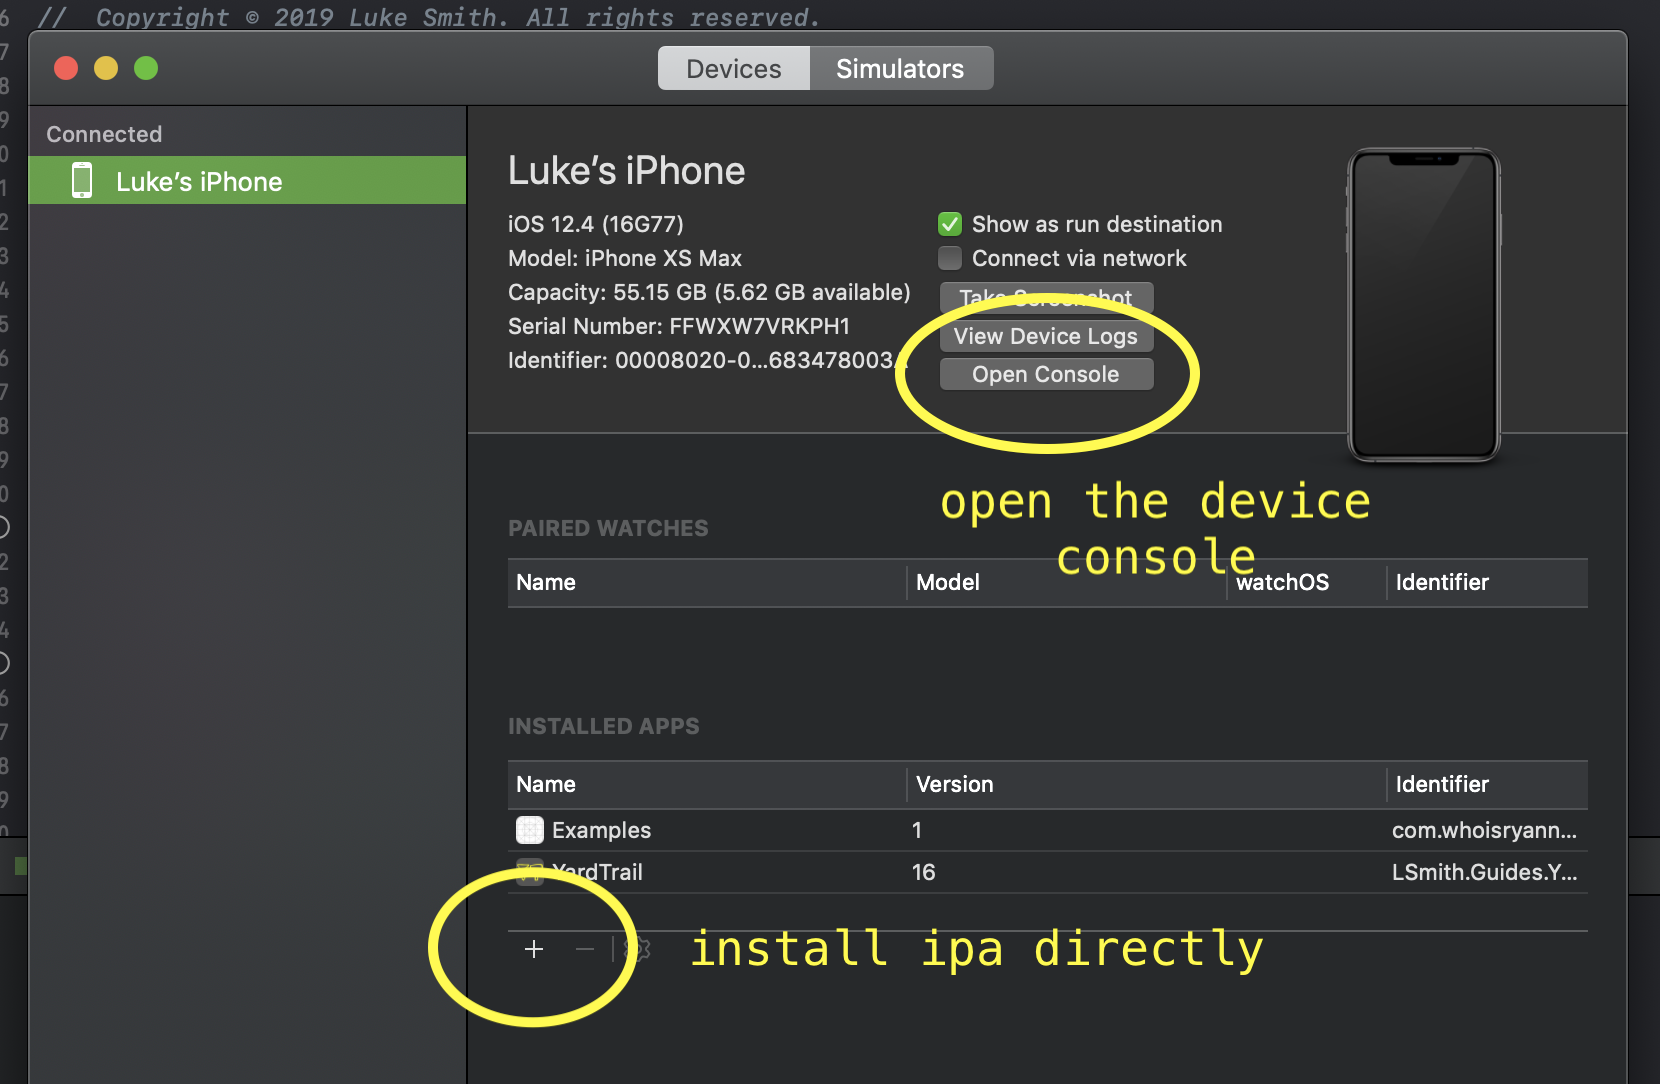
In the devices tab that comes up, you can then highlight a device that you have plugged in to the Mac. You can open the Console, which is interesting first time – because what you see is an enormously quick stream of output from absolutely everything thats currently running on your device (BTW – the Console app in MacOS, in Applications -> Utils, is the same thing). Its too much info for use just like that, and needs refinement. Normal print or NSLog statements do not appear in this console, which is why we need to use OSLog.
For my scenario, I was installing .ipa files directly onto the device (something you used to do via iTunes). To do that you click the ‘+’ icon at the bottom and then choose the .ipa file that you have built and then exported as ‘ad-hoc’.
So if you have clicked on the Console button, you can see the mad stream of info that your phone is outputting, and appreciate its not very useful as it is. What we need to do is to be able to refine the info on display there. When we create OSLog statements, we can add ‘category’ and ‘subsystem’ fields, as this image shows, by right clicking (two finger tapping?) on the bar at the top of the console.
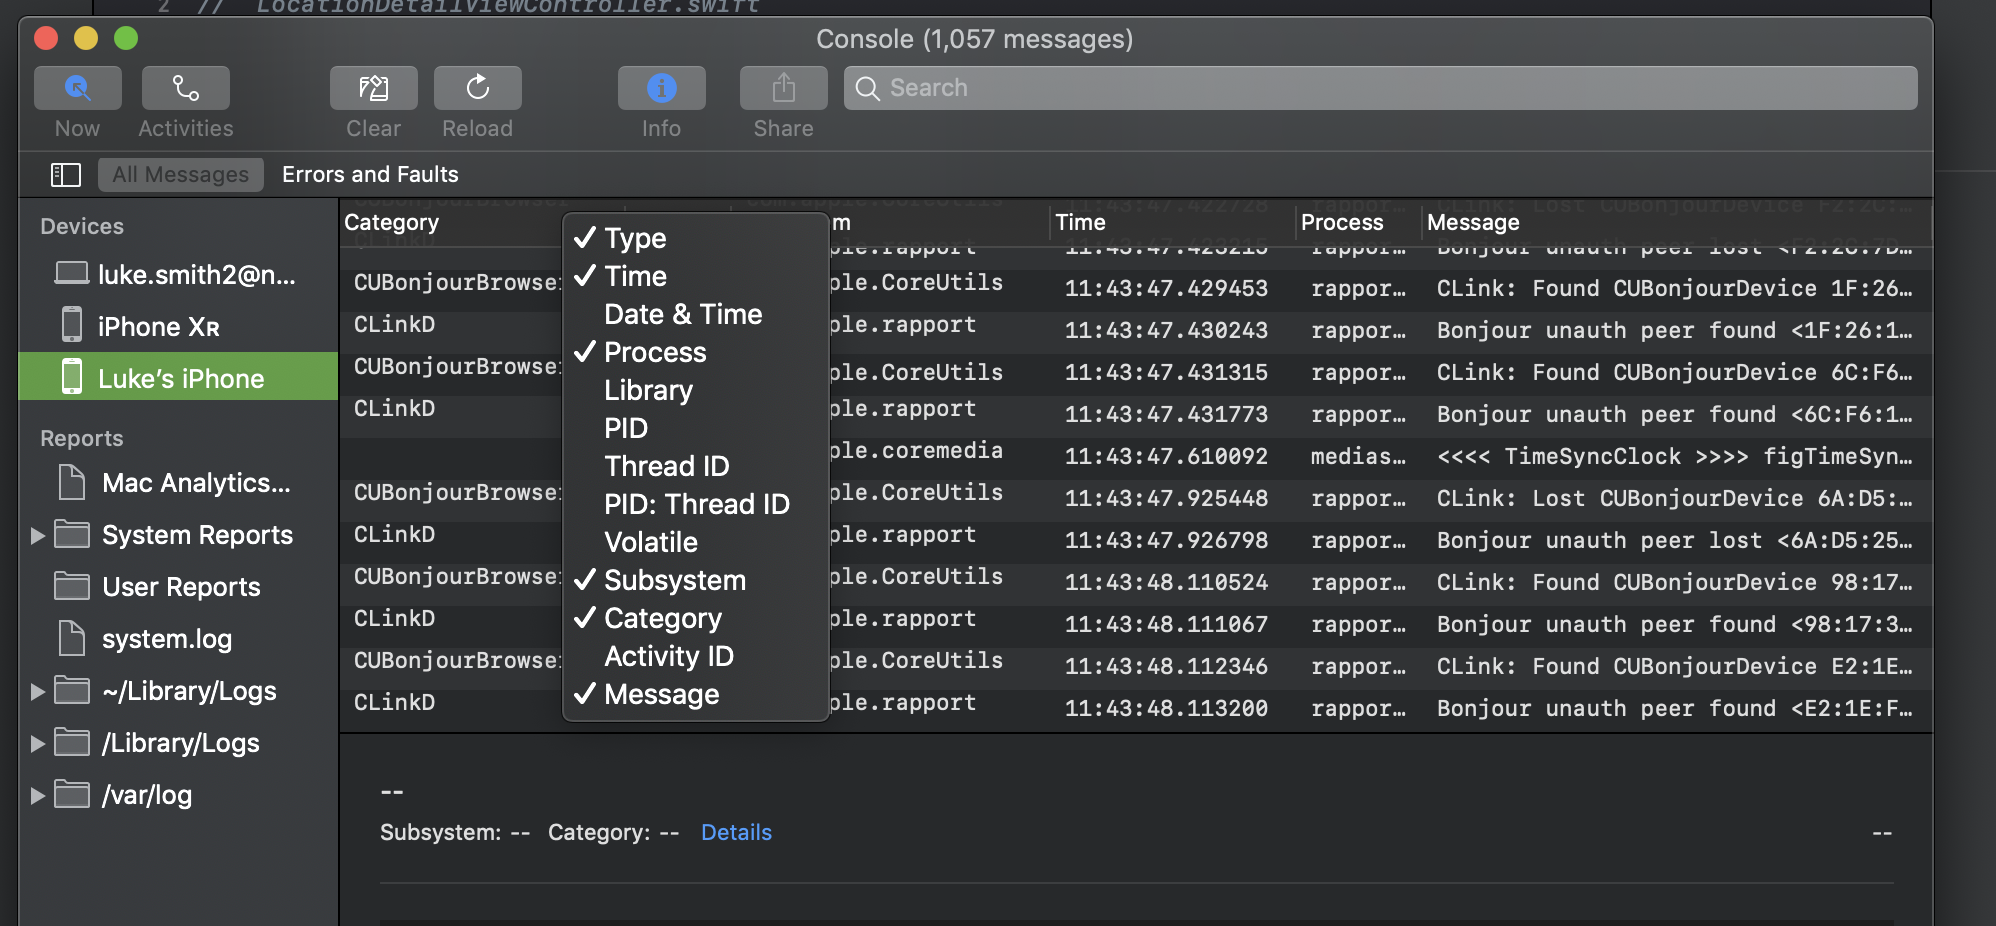
So add a tick next to Subsystem and Category, as these we can set when we use OSLog.
Now for adding OSLog itself. Its available as standard as an Apple library, but you have to import it to use it. The best way to set it up is to create an extension that creates those Subsystem and Category settings that we specify in each OSLog call, and that we can then filter in the console above. So add a new file, where we will specify this extension, as below :
import Foundation
import os.log

extension OSLog {
    private static var subsystem = Bundle.main.bundleIdentifier!

    static let ui = OSLog(subsystem: subsystem, category: "UI")
    static let firebase = OSLog(subsystem: subsystem, category: "Firebase")
}
So as you can see in that snippet, for subsystem, Im using the name of the main bundle. Then Ive created other static vars to represent some categories – in this case Ive got a UI category, and a firebase category. With that set up, I can go and drop a log statement anywhere in code, like this :
import os.log
...
os_log("Error getting search cat documents: %@", log: .firebase, err.localizedDescription)
For old Objective-C devs like me, its got the recognisable format you use with an NSString statement or an NSLog. To drop a property into the log string, we add %@ into the string, and then name the property at the end of the statement. BTW that %@ changes depending on what we are dropping in – for eg %.2f will put a float in, and format it to two decimal places.
The main thing to note above though is that because we set up our OSLog extension with the subsystem set to the name of our main bundle, all os_log statements like the above are referenced with that name. Then we specify the category in the ‘log’ part of the statement – above we used the category ‘.firebase’.
With an os_log statement in a simple place in your code for testing, rebuild your code and put it back onto the device (obviously you can just install it directly from XCode, or you can do a build, export it Ad-Hoc and put it onto the device manually, etc). The important thing is that we do not need to run directly from XCode to get the new log statements – we can see them in the device console I first mentioned at the top of this article. Ensure the Console is open before you run the installed app – you cannot see console messages that pre-date the time when you opened the console.
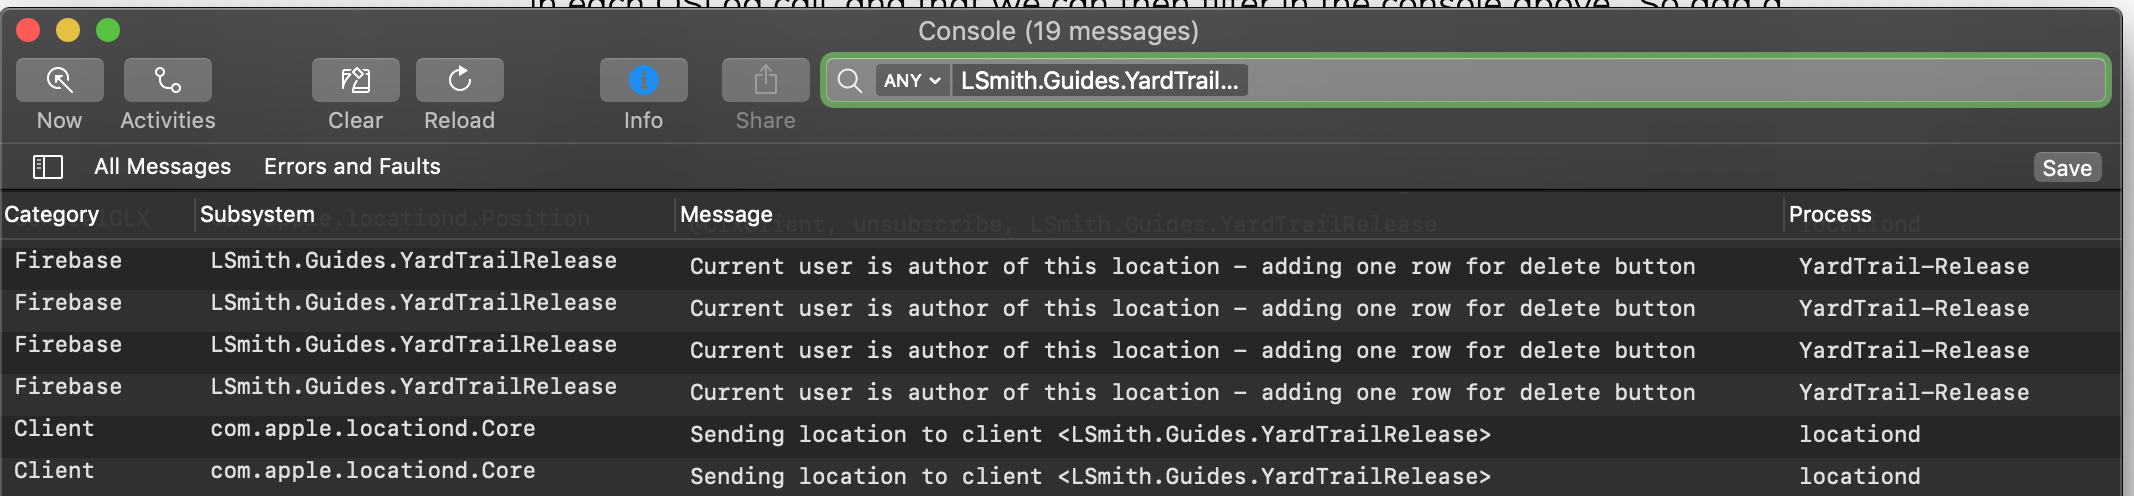
With the app running and the console open, you can now filter the live logs to see your os_log messages. Just to reiterate – this happens whether or not XCode is debugging live. You can plug any phone (trusted) into any Mac and open the Console, and you can see these console messages without the code. To just see the logs coming from your app, copy your bundle identifier from the targets window and paste it into the search bar. Because our ‘Subsystem’ was specified in the OSLog setup (extension) they now appear in that column. Also our Category as specified also appears in the category column :
You could alternatively just search for your specified category to only see that output – it helps to give it a fairly unique name in some cases. Category name ‘UI’ for example, is a bit too general.
It’s worth remembering that it’s possible for these messages to go into released builds and onto Appstore releases so the general public, if so inclined, could read them. There are further settings available for OSLog that enables the fine tuning of that. Its worth reading some of the documentation and use cases for further info